I've had a busy day over at Paper Posies for the 4th Anniversary Party! There's lots of fun and games happening in the Anniversary Forum here
I wanted to share the Mini Coaster Album tutorial I posted for this month's Anniversary challenge using the May kit from Paper Posies. I love mini albums because they are quick projects that don't use alot of card stock and make fabulous gifts for friends and family!
Let's get started!
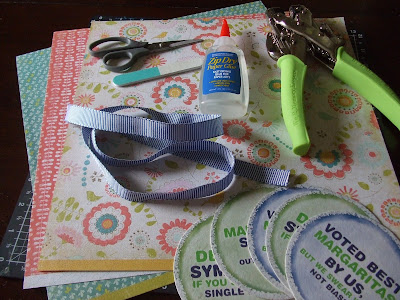

Some supplies you'll need: Coasters ( you can find them in the $1 bin at Target or the $ Store)
Pattern paper ( I used Crate Paper from PP May kit) Zip Dry glue, pencil, file, scissors, Crop a Dial or a hole punch and some ribbon or a ring or hemp to attach the album together.

Trace the coaster on your pattern paper and cut it out. I usually place mine on the top left corner to save paper.

Now you have your paper the shape of your coaster

Apply Zip Dry to coaster

Cover the coaster with the pattern paper and make sure it covers evenly and smooth it on with your hand

Next you'll need to trim the excess paper from the coaster using the file. These files usually come in distressing kits. A regular nail file works just as well. I learned this tip for trimming paper off of chipboard from Kelly Goree at Winter CHA. Hold the coaster in your hand and take the nail file in downward strokes going along the edge of the coaster to trim the paper off.

There won't be alot of excess paper since we traced the coaster on the cardstock.

Finally use your crop a dial or hole punch to make a hole for the ribbon or ring to attach your coasters into a mini album.
Repeat the steps for as many pages of this album you'd like and embellish! When you're done, tie your album together with ribbon or use a ring to hold the pages together.
I'll be back tmr to post my completed project. I hope you'll give this fun project a try.
Have a great night!


1 comment:
Oh, what an awesome idea! Love it!
Post a Comment