Showing posts with label Cardmaking. Show all posts

Anna Griffin Trimmings Cut and Emboss folders

Wednesday, April 15, 2020

Hello friends! Today I am sharing some of my designs with Anna griffin's Trimmings cut and Emboss folders featured again on HSN yesterday. 


I love that you can layer these folders for a fun look. For this card, I used two of them and a floral border sticker.


This one has 3 layers of the same folder.


For this card I turned the layer vertically and added another floral border stip and sentiment.  


Here's another vertical card. The border really adds to the design of the card.


I love using the color purple in my designs. I love how this one turned out.


If you'd like to pick these up, you can order them from Anna Griffin's website here 
Thank you for stopping by today!

{S}

Cardmaking fun with some Rina K Designs Electro-Pop Neon Flock

Friday, April 10, 2020

Hello friends! It's been awhile I know and wow have things changed in the world. I hope you are all safe and well during this unprecedented Stay at Home order. I wanted to share with you some really fun products from Therm-o-Web and Rina K Designs. I created these projects for the blog last week.

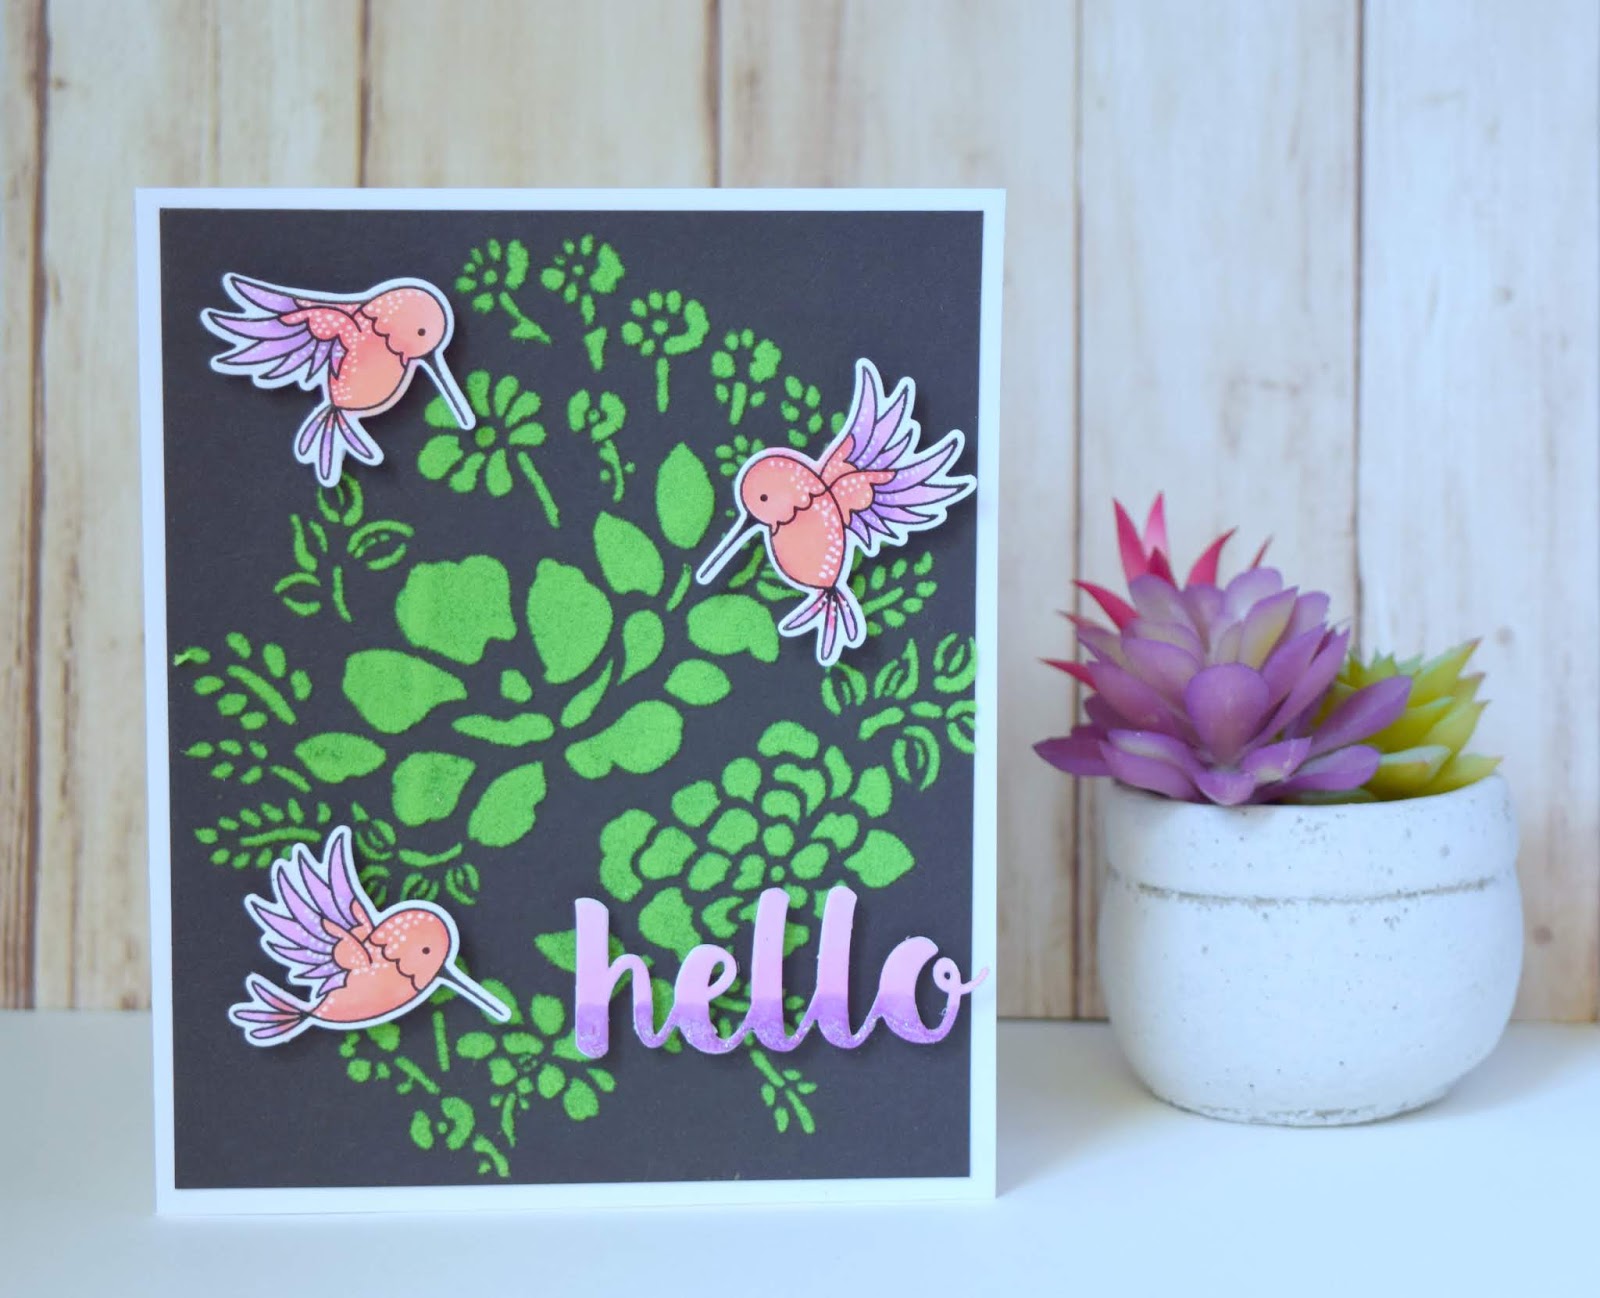
Here's a look at the supplies I used to create these cards. Therm-O-Web's deco flock can really take your projects to another level. Rina K's fun Electro-Pop Neon colors look fabulous on black cardstock too! 


I started out with some black cardstock and a fun Hero Arts stencil that I used Pixie Spray to adhere to the cardstock so that when I spread the Deco Foil transfer gel duo would stay in place.


Apply the gel generously and let dry overnight. It's also ready in about 90 mins but I personally prefer to allow to dry over night.


While that was drying I colored the hummingbird images with my Copic markers.


I then used my favorite white gel pen from Sakura to enhance my images.


Another fun way to use Copic markers is to die cut sentiments and color them in a gradient manner using darker and lighter shades of color. For the Hello I chose to use shades of purple.


The finished look turned out so fun. I also added some glitter stickles to the bottom where the darker purple was.


Here's my finished sentiment.


And my cute hummingbirds with the flocked cardstock.


Now that the Transfer Gel Duo has dried, simply place the flock, color facing down on the dried gel and run through your laminator.


Once it cools, gently peel back the sheet of Deco Flock to reveal the design. Easy, peasy.


The finished cards turned out stunning. This is an easy technique to achieve. Right now Therm-O-Web is offering free shipping when you spend over $25.


These cards were so fun to create.


I hope that you'll give these products a try. If you do, be sure and tag them on social media with #thermoweb #decofoil #rinakdesigns 

Have a craftstic day!


{S}

Sending Sunny Thoughts

Sunday, March 31, 2019

Hello friends! Today I am sharing a card I made using the new Gina K Designs Stamp n Stencil along with the brand new Glitz glitter gel. These new products are so much fun and easy to create with. 


First I stamped images from the Crazy Daisy and Petals & Wings Stamp n Stencil sets with Gina K. Designs inks. I love working with these ink squares because the colors are so vibrant.


Once I stamped all the images I wanted to possible use, I then matched the coordinating dies and cut them out using my die cut machine. I played with them a bit arranging them in the shape of a wreath to see how I wanted to use each piece.


Using the coordinating stencil and a darker shade of purple, I inked the center of the light purple die cut flowers.


To the center of the larger flowers, I applied the Glitz glitter gel in the turquoise sea and the stencil to the centers. Once it dried the detail was very vibrant.


I measured my cardstock to 4 1/3 X 5 1/3 and stamped my sentiment in the center so that I could build the wreath around it.


I arranged the die cuts how I liked the look the best and then used our 3D foam squares to adhere to the die cuts to the card base.

I finished off the card with a beautiful bow and now we have a beautiful finished card.


Here's a look at all the supplies I used and a bonus card!


I hope you'll give these products a try with your next creation. Thanks for stopping by!

{S}

 
site design by designer blogs