Stamp of the Week Sunday

Sunday, March 16, 2014

Hello friends. Where did the weekend go?? I can't believe it's already Sunday again. Well the best part about that means that we have a new Unity Stamp of the Week! 

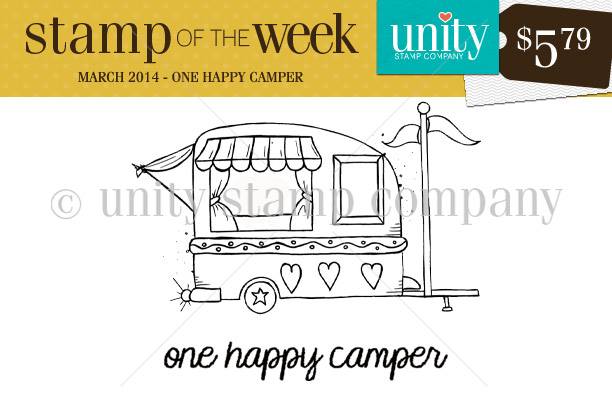
Here's today's reveal...


Here's my sample with this little cutie!


 photo SOTW115UW.jpg

All Supplies used except stamps, button and twine are from my Simon Says Stamp March card kit.


 For more creative inspiration make sure you visit Unity's Stamp of the Week Pin Board over at Unity's Pinterest page.  Now you only have one week to claim this cuteness for your own. 
Hurry over to this page to find out how you can sign up to have some Unity Happy Mail in your mailbox each week!


I hope you find something crafty to do today!

Thank you for stopping by.


{S}

We R Memory Keepers Envelope Punch Board paired with Envelope Wraps

Thursday, March 13, 2014

Hello friends. Did you happen to catch Andrew from We R Memory Keepers on HSN a few weeks ago? Well if you missed the show, the items are available at HSN. I recently made some samples for the show with the ever popular Envelope Punch board and Envelope Wraps.

 We R Memory Keepers has a variety of styles of Envelope Wraps. I created with 2 different collections. Here's a look at the Kraft collection.


Here are some samples with the Notable collection.


The Envelope Punch Board makes it easy to create a variety of cards and matching envelopes. I created all of these samples in under 30 minutes.

Next is a look at the Floral Envelope Wraps.


I paired these with the Chalkboard collection. I love the way these turned out. So girly and fun!


 So fun right? I really enjoy mailing handmade cards to friends and family. This makes it a whole lot quicker!


Have a creative day!

{S}

Creating for Fun Tuesday

Tuesday, March 11, 2014

Hello friends! I didn't have as much time as I'd like to create for fun this week but I did manage to create for My Favorite Thing's get Sketchy Challenge!


Here's this week's sketch


Here's my take on the sketch.


 photo MFTWSC166a.jpg


Supplies: (My Favorite Things) Die: Pierced circle Stax, Pure Innocence Wish you were here. Copic markers, Patterned paper. Twine and button.


If you'd like to get Sketchy, there's a new sketch every week so stop by the My Favorite Things blog for more info!

Have a creative day!

{S}

Albums Made Easy Monday {The Insta-Life Project}

Monday, March 10, 2014

Hello friends. Thanks for joining me for this week's Albums Made Easy Monday. I love taking photos with my iPhone and sharing them on Instagram. Yep I am that lady you see photographing her food, my kids, park play, the beach...you name it! I love photographing our life and sharing it with family and friends we don't see everyday. I love that I don't have to lug around my Nikon everywhere we go.
So I wanted to start compiling those photos weekly. Sort of like Project Life but in my own way...

Let's call it Insta-Life:
 A week in my life thru Instagram photos.

We R Memory Keepers has 4x4 photo sleeves that make it a snap to get my photos off my phone and into my albums. 
Here's a look at the sleeve I am talking about.

12x12 Ring (9-4x4 Photo Sleeves)


I have my phone set to transfer my images to my laptop so I can easily find and edit them in Picasa. I am a home photo printer. I'm an impatient person, maybe it's the Aries in me but I am a NOW person so I use Picmonkey.com and Picasa.com to edit my photos so that I can print them right away
I own a Cannon Selphy and a HP All in One. Both do a great job printing my photos and both cost around $100.00.

In Picasa there is not a 4x4 option to print so I chose the 4x5 option and pick 4 photos to print. Then I click the "shrink to fit" tab and the photos turn to a little less than 4x4 in size like this.


I print them on 8 1/2 X 11 Kirkland photo paper from Costco. It's 19.99 for a 150 sheets. A great deal. Once they are printed, I cut them into the 4x4 Instagram size but just slightly smaller so that they slide easily into the sleeves like this.


I like to have the white boarder around my photos. You can also cheat and achieve this look by cutting white cardstock at slightly smaller than 4x4 and then cutting your photos down to mat.


 photo AMEMar10.jpg


I didn't have any of the 9 4x4 sleeves to start with So I used the 6 4x4 and 4 3x4 sleeve.

 I decided for my Insta Life pages I would go from Monday to Sunday and I used the We R Memory Keepers/Lifestyle Crafts die Oh Happy Day for the Month and some Basic Grey stickers for the dates.


The dies were easy to adhere using my Xyron 1'5 inch Sticker maker.

To add my own style I added some of my Unity SMAK kit images and some simple embellies.


I affixed this flower on the outside of the photo sleeve. I also stamped the best friends image directly on my photo with Staz-On ink.

So there you have it. My Insta-Life March 3-9

I hope you found some helpful tips here today. Please feel free to leave me any questions you have and I will do my best to respond as promptly as possible.

Have a creative day!

{S} 
Unity Thursday

Thursday, March 6, 2014

Hello friends! Thanks for stopping by for today's Unity Thursday. I am your last stop on today's inspirational new release journey. 
Now that you've seen some of the new releases don't forget this adorable stamp is free with a $50 purchase!


These are just beautiful and available now at Unity.


Here's what I created with one of  these beautiful images.

 photo Fillmyheartmar6UW.jpg


And this little guy...Ohh so cute! Right?


 photo Littlenotemar6uw.jpg 

 Simple and sweet right? A little bit of happy to send to someone you love.

Do you still send cards in the mail? How often? I send them weekly. 

Yep, true story.  Well what did you think I do with all my samples? LOL

Have an amazing day.

DO

Something

CRAFTY!

{S}

Anna Griffin 20th Anniversary stamped project shares

Tuesday, March 4, 2014

Hello friends! Did you catch Anna on QVC UK this past Friday? She was sharing some beautiful products with her fans in the UK! I wanted to share some of the 20th Anniversary Stamps projects I created. I loved stamping these in Anna's Fresh tints inks that are available here at HSN!

20th Anniversary Stamp set projects


Using all of the beautiful die cuts, All Occasion 3D Sentiment garlands, Cottage Roses and other Anna products available at HSN helped make these cards come together so easily. I also love Ann's border stickers and how easy they are to use.


Have a creative day!

{S}

Albums Made Easy Monday-Tools of the Trade

Monday, March 3, 2014

Hello friends. Thanks for joining me for another Albums Made Easy Monday. I got an email from someone asking about how to get started with the Albums Made Easy System and what products I suggested for using to keep everything organized. So today I want to share with you my  "tools of the trade."

You want to start with a good photo album. I prefer the Classic Leather 3 ring album. My personal color is Kiwi to match the green and brown in my living room.I love this album because it does not smush my pages. I love that the pages snap in easily and my embellishments don't get ruined over time. The spine has a tab I can label what year or event I have documented and they look great stacked together on my bookshelves in my living room.


12x12 3 Ring Classic Leather album
Then you choose your inserts.


Some of my favorite tools are the 3x4 punches that now come in rounded corners or square.

rounded 3x4 punch

square 3x4 punch


I love my magnetic mat and ruler.


And finally for the storage of all my supplies, I love the Albums Made Easy Organizer-card cabinet.
These drawers have tabs to separate your cards by theme, color...however you choose to store your cards.


 Albums Made Easy-sleeves shelf. 

There are tabs to help you store the different styles of photo sleeves that are available. Personally, I store them all with the dividers separating them on the top shelf and all of my solid paper on the rest of them.


So there you have it. All my favorites for crating up some fantastic Albums Made Easy pages.


Have a creative day!

{S}

Stamp of the Week Sunday

Sunday, March 2, 2014

Hello friends. It's time for another Stamp of the Week Sunday reveal. 

{Thinking of You}

Here's my sample for this week's inspiration

 photo SOTW113UW.jpg
Supplies: Recollections: Today Tomorrow Forever 12x12 paper pad, Prima flower, Spellbinders dies, Copic markers, Recollections rhinestones.

 For more creative inspiration make sure you visit Unity's Stamp of the Week Pin Board over at Unity's Pinterest page.  Now you only have one week to claim this cuteness for your own. 
Hurry over to this page to find out how you can sign up to have some Unity Happy Mail in your mailbox each week!


I hope you find something crafty to do today!

Thank you for stopping by.


{S}

A little Night Owl crafting

Saturday, March 1, 2014

Hello friends! Hooray for the weekend. I love these lazy Saturdays because that means that Friday evenings are perfect for a little Night Owl crafting!


I love to participate in My Favorite Things challenges. So last night I stopped by the blog to see what this week's sketch challenge was.


I was really inspired by Melody Rupple's sample of this week's sketch. She used molding paste with one of the new MFT stencils to create with. I had an "I have some of that stuff" moment and went digging into my closet.

I don't have any MFT stencils but I did purchase a Prima stencil last weekend at Custom Impressions last weekend so I used that to try this technique out with.

Here's how my first attempt at using the molding paste turned out.


for believing in me

 photo March4th.jpg


I used MFT's Sending Thanks set for my sentiment. After looking through my stash of MFT stamps, I realized I need some smaller sentiments since I keep using the same set. I have several Pure Innocence sets but the sentiments didn't seem to fit the style of the card.


 photo March4thdetail.jpg

Here's a closer look at the detail. I love the way this turned out. I want to try using mists, copics and other ideas for adding color to the molding paste.

Supplies:
Cardstock Bazzil Candy Necklace
Basic Grey Fresh Cuts collection
My Favorite Things Sending Thanks clear stamp set
McGill mini petals punch 
Queen and Co. Goosebumps teal
Golden Molding Paste
Prima Finnabair 6x6 elementals stencil
We R Memory Keepers Corner Chomper 3'8 inch
Studio G pigment ink teal


If you'd like to create for this week's sketch, click the banner below for all the details!

http://www.mftstamps.com/blog/stamp-and-win-with-this-weeks-card-sketch-165/

 Thanks for stopping by today!

{S}

Albums Made Easy Monday

Monday, February 24, 2014

Hello friends. Thanks for joining me for another Albums Made Easy Monday. Today I have 2 new tips to share with you. Last week we talked about using the 3x4 punch to make your own AME inserts. 

Here's where we left off.


 photo AMEFeb17-1.jpg


And here's the finished layout 


 photo AMEFeb24.jpg

I ended up switching out the left 3x4 card and used a few coordinating embellishments from the Game Day collection and some fun football brads from Eyelet Outlet to finish my page. I also used the We R label punch.

My first tip is for using die cuts or embellishments that have a shiny texture like the thought bubble I used above. How many times do you go to journal in them and the ink doesn't dry and you smear it? I do know that Sharpie also has fine point markers but sometimes you don't have one on hand. Since I typically use the ZIG Millenium .08 to journal with I found that if you sprinkle clear embossing powder over the ink and heat emboss it your problem is solved.

 photo AMEFeb24a.jpg

Now onto tip #2
I don't always like my journaling to be visible in my layouts so I try to find clever ways to hide it. Here's a tip for hiding your journaling on a 4x6 AME insert.

 photo AMEFeb24b.jpg

I created several layers, including some glitter tape to enhance my insert. Then I used a craft knife to cut a slit just about the green football strips that would fit my Unity Stamp Co. Library card image.

Then I journaled on the card and slid it into the insert so that only the top is showing.

 photo AMEFeb24c.jpg

Here's a view of the back.

Now for last week's winner of the Game Day sample pack!

Regina Hamilton said...
I've been thinking about these albums for awhile, but never purchased them. I really need to give theses a try, maybe then I'll get some of my pictures out of the boxes their in.

Stamp of the Week Sunday

Sunday, February 23, 2014

Hello friends! I hope you are having a wonderful weekend so far. I had a great time cropping it up last night at Custom Impressions in It's time for another Unity Stamp of the Week reveal. 


Live your Dream

Here's a sample I created to share.

 photo SOTW112UW.jpg


For more creative inspiration make sure you visit Unity's Stamp of the Week Pin Board over at Unity's Pinterest page.  Now you only have one week to claim this cuteness for your own. 
Hurry over to this page to find out how you can sign up to have some Unity Happy Mail in your mailbox each week!


I hope you find something crafty to do today!

Thank you for stopping by.

{S}

More Unity love

Saturday, February 22, 2014

Good morning friends. Ahhh the weekend, so glad it's here! Today I am sharing another card I made with one of the Itty Bitty sale items at Unity Stamp Co. These prices are good thru Monday at midnight so don't miss out!


I used the Cup of Tea image.


 photo CupofTeaUW.jpg

Not sure you can tell but I stamped the teabag image on vellum paper and them colored it with Copics. It really distorted the vellum in the way the copic marker dried. I probably would not do that again but rather use a cream piece of vellum instead. Grafix makes a great pad of multiple colored vellum sheets and they take embossing well without buckling.

I am off to craft for the day with some sweet girls in Bellflower for the day.

I hope you get to do something creative today!


{S}
 
site design by designer blogs