Many of you expressed that you were interested in this method of Scrapbooking in your comments on last week's post so I am assuming that means that many of you have not tried the AME system yet. I'm sure after you spend a little time with me here, you'll find that it's a great way to get multiple pages done in a short amount of time. You'll also find that you'll be using more of your photos than every before.
Another great thing about Scrapbooking this way is that you can keep it as simple as you like or you can add a variety of embellishments, die cuts and stamped images that show your personal style.
So are you ready to get started? Well alright! Here we go...
Let's start by talking about photo sleeves. We R Memory Keepers Albums Made Easy offers you 5 styles of Photo Sleeves to work with. Here is a look at those styles.
And the 12x12 Photo Sleeve
Now you can choose to work with the same Photo sleeve or you can mix and match them. I still enjoy Scrapbooking 12x12 layouts, so I like that I can mix and match the multiple photo sleeves with a 12x12 layout.
Now let's talk about Scrapbook. If you like to add embellishments like I do, then you want to use the 3 ring binder for storing your AME pages. I have the 12x12 3 ring Kiwi Classic Leather Albums for my layouts.
You could use the Classic Leather Post albums but the pages don't turn as easily in my personal opinion. The other problem I found is that over time my embellishments became smashed and the layouts did not look as nicely as they did when I snapped them inside the album.
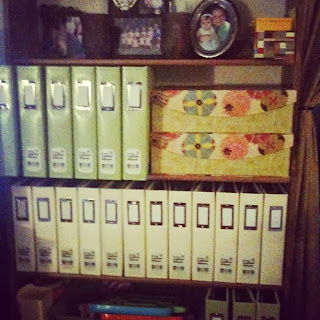
The 3 ring binders look fantastic lined up on my bookcase (pre- iphone 5 pic and excuse the labels I did not even take the time to peel off) I also have the ivory 8 1/2 X 11 Size for storing my rubber clings stamps. That is a great way to store then with the EZ Mount boards.
The 3 ring binders look fantastic lined up on my bookcase (pre- iphone 5 pic and excuse the labels I did not even take the time to peel off) I also have the ivory 8 1/2 X 11 Size for storing my rubber clings stamps. That is a great way to store then with the EZ Mount boards.
With the 3 ring you do have to pay attention when you slide them into the book case because the pages might bend downward and you could end up smashing your pages as you slide the album in. To avoid this I simply pinch the top of the pages as I slide the album into my bookcase to keep the straight.
Finally, let's talk about the Journaling Cards.We R Memory Keepers offers several styles and colors Albums Made Easy Journaling cards. You can view all the selections available here on the We R Albums Made Easy page.
New for the Albums Made Easy system is the 3x4 Card Punch which is now available in rounded and straight corners. You can use this tool for photos or patterned paper scraps that you would like to turn into inserts for yous Albums Made Easy sleeves.
Now that we've talked about the products that make the Albums Made Easy System easy to use, I'm ready to take you thru my process of completing a 2 page spread featuring the Chalkboard collection next Monday.
But before I go, I'm offering up another Albums Made Easy prize package!
Leave a comment to win a prize package that contains: 2
12x12 Albums Made Easy photo sleeves to create your first spread, a
sampling of Albums Made Easy Journaling cards and a coordinating sticker
sheet from our September featured collection:
Chalkboard
Thanks for stopping by!
{S}


